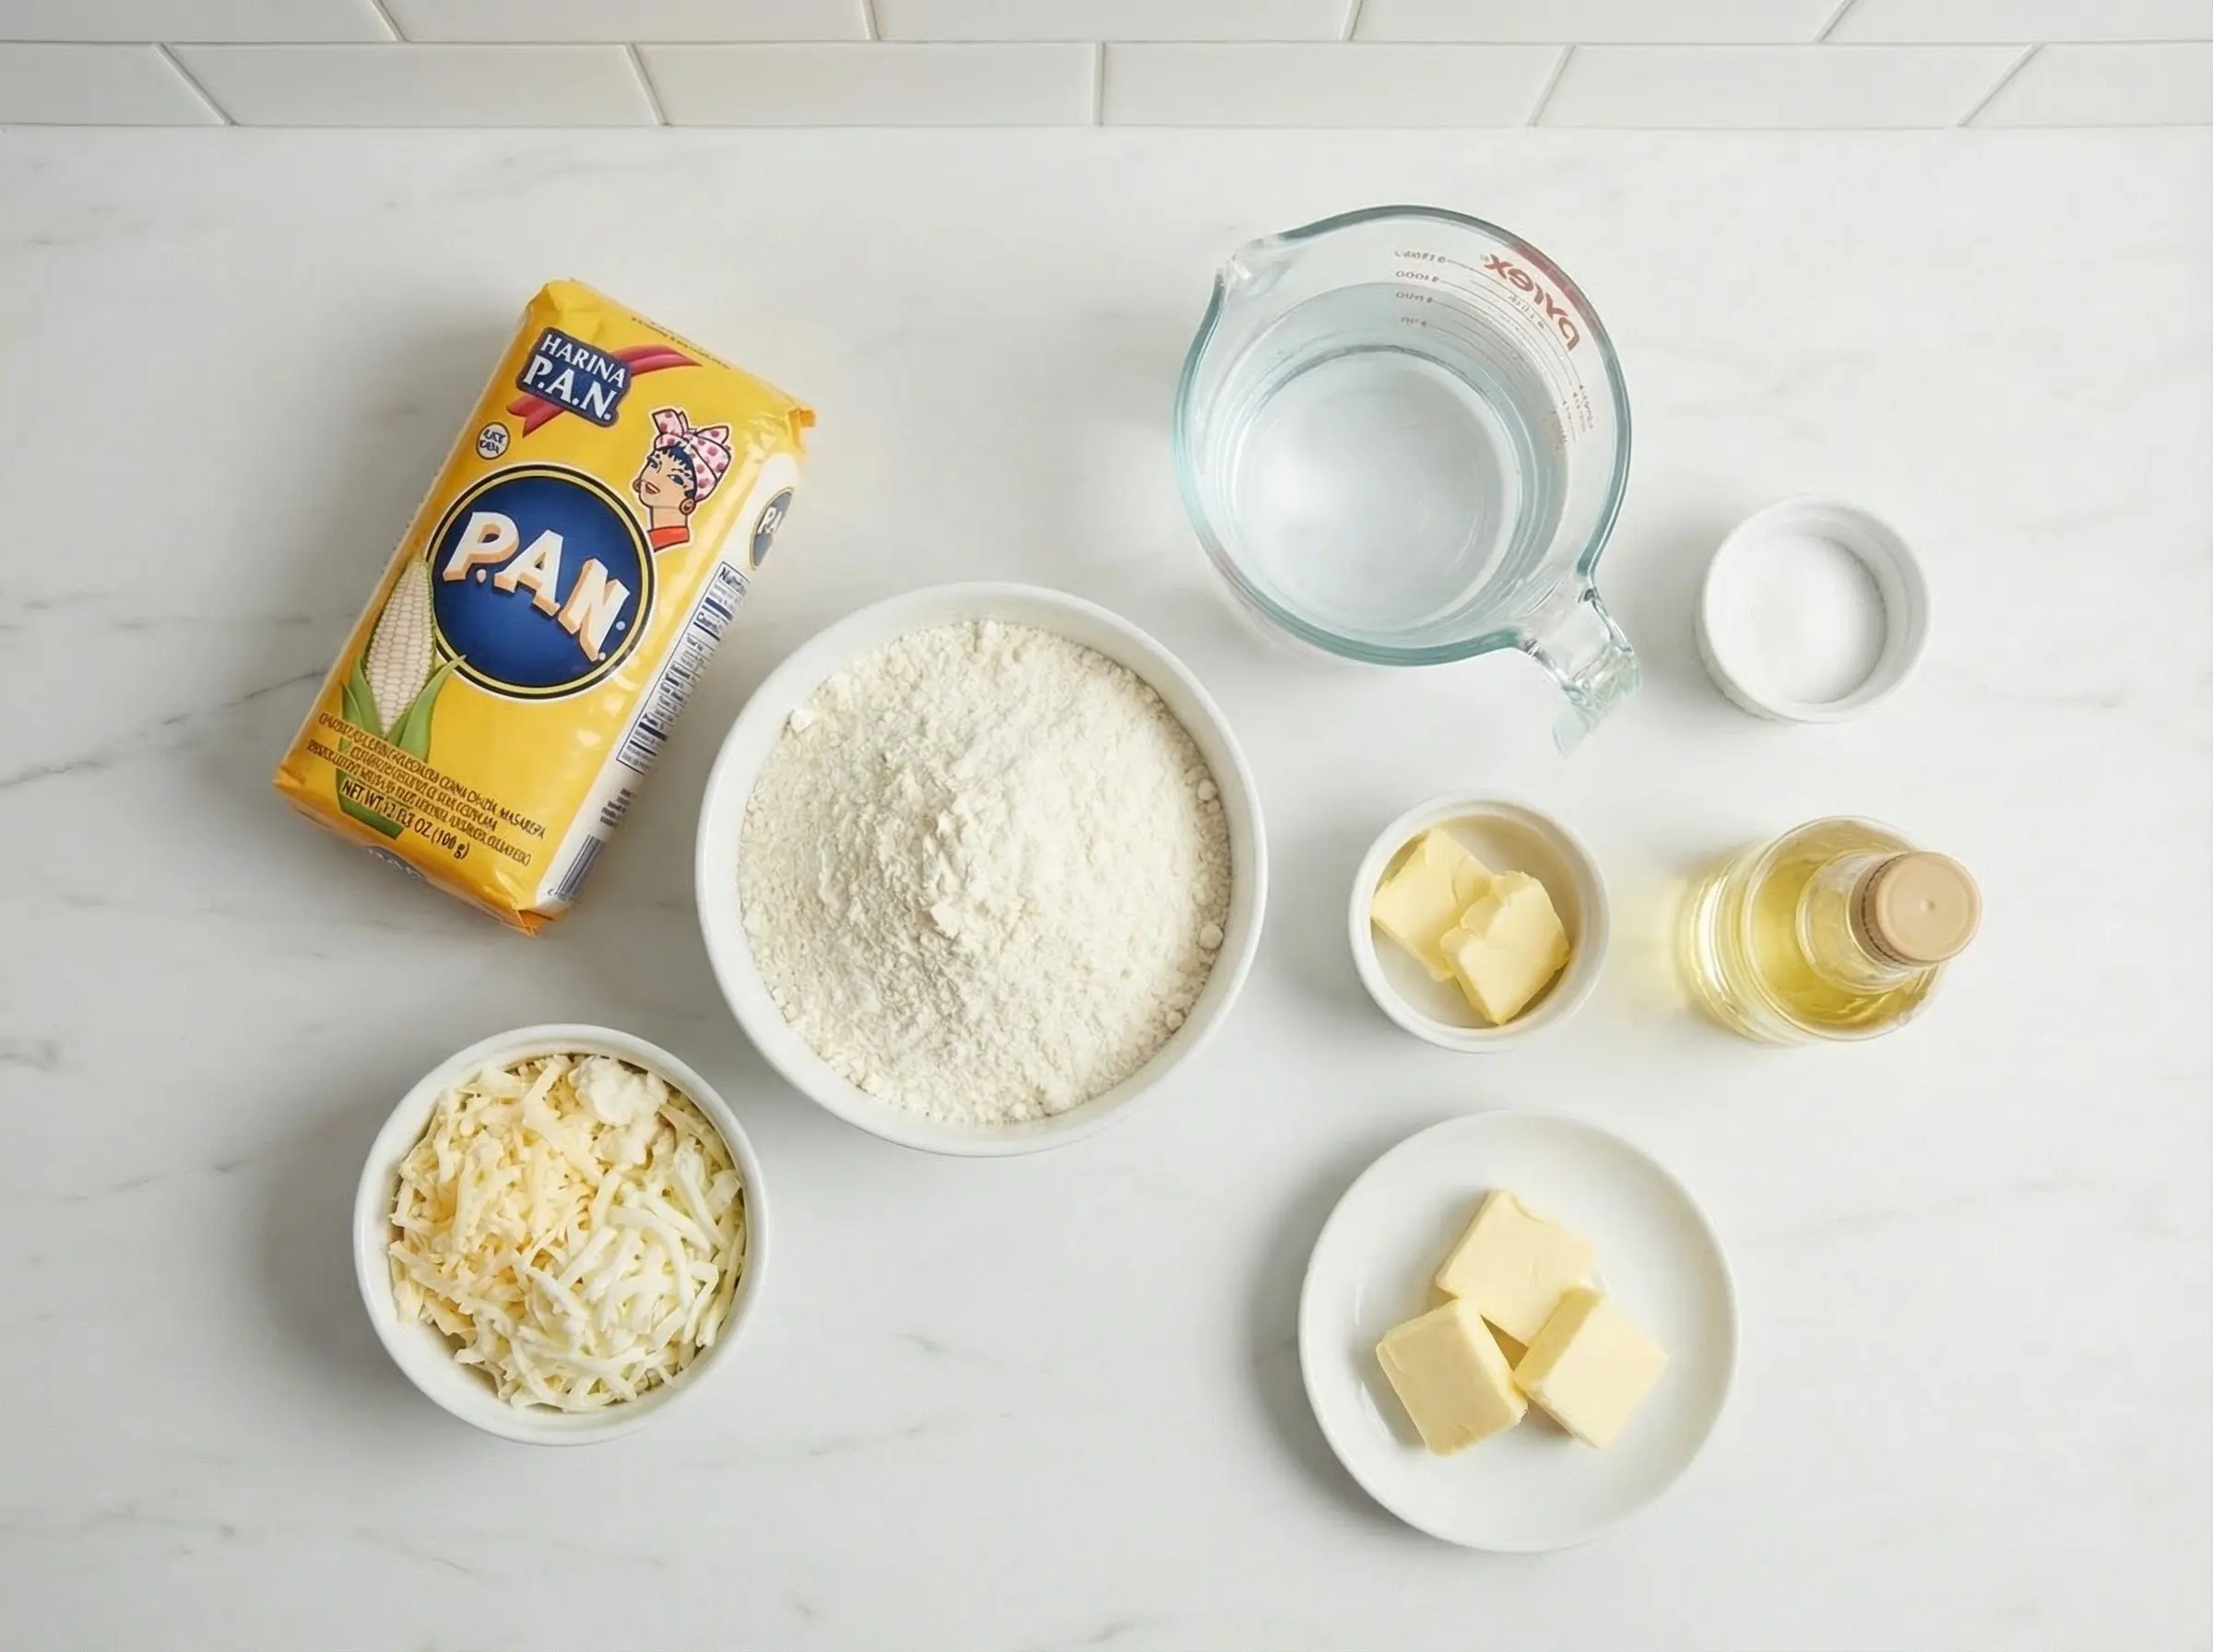
1Make the arepa dough. In a large bowl, combine the warm water and salt, stirring until the salt dissolves. The water should be warm but not hot - about the temperature of a comfortable bath. Gradually add the masarepa (pre-cooked corn flour) while stirring with your other hand or a wooden spoon. Mix until a soft dough begins to form. Add the vegetable oil or butter if using - this makes the arepas slightly richer and helps prevent cracking. The dough should come together without being sticky or crumbly.
2Knead the dough in the bowl for 2-3 minutes until smooth and uniform with no dry spots or lumps. The consistency is crucial: the dough should be moist and pliable like playdough, holding together easily without cracking at the edges when pressed. If the dough cracks when you form it, it is too dry - add water a tablespoon at a time, kneading after each addition. If it sticks to your hands, it is too wet - add a bit more masarepa. Let the dough rest for 5 minutes - this allows the flour to fully hydrate and makes the dough easier to shape.
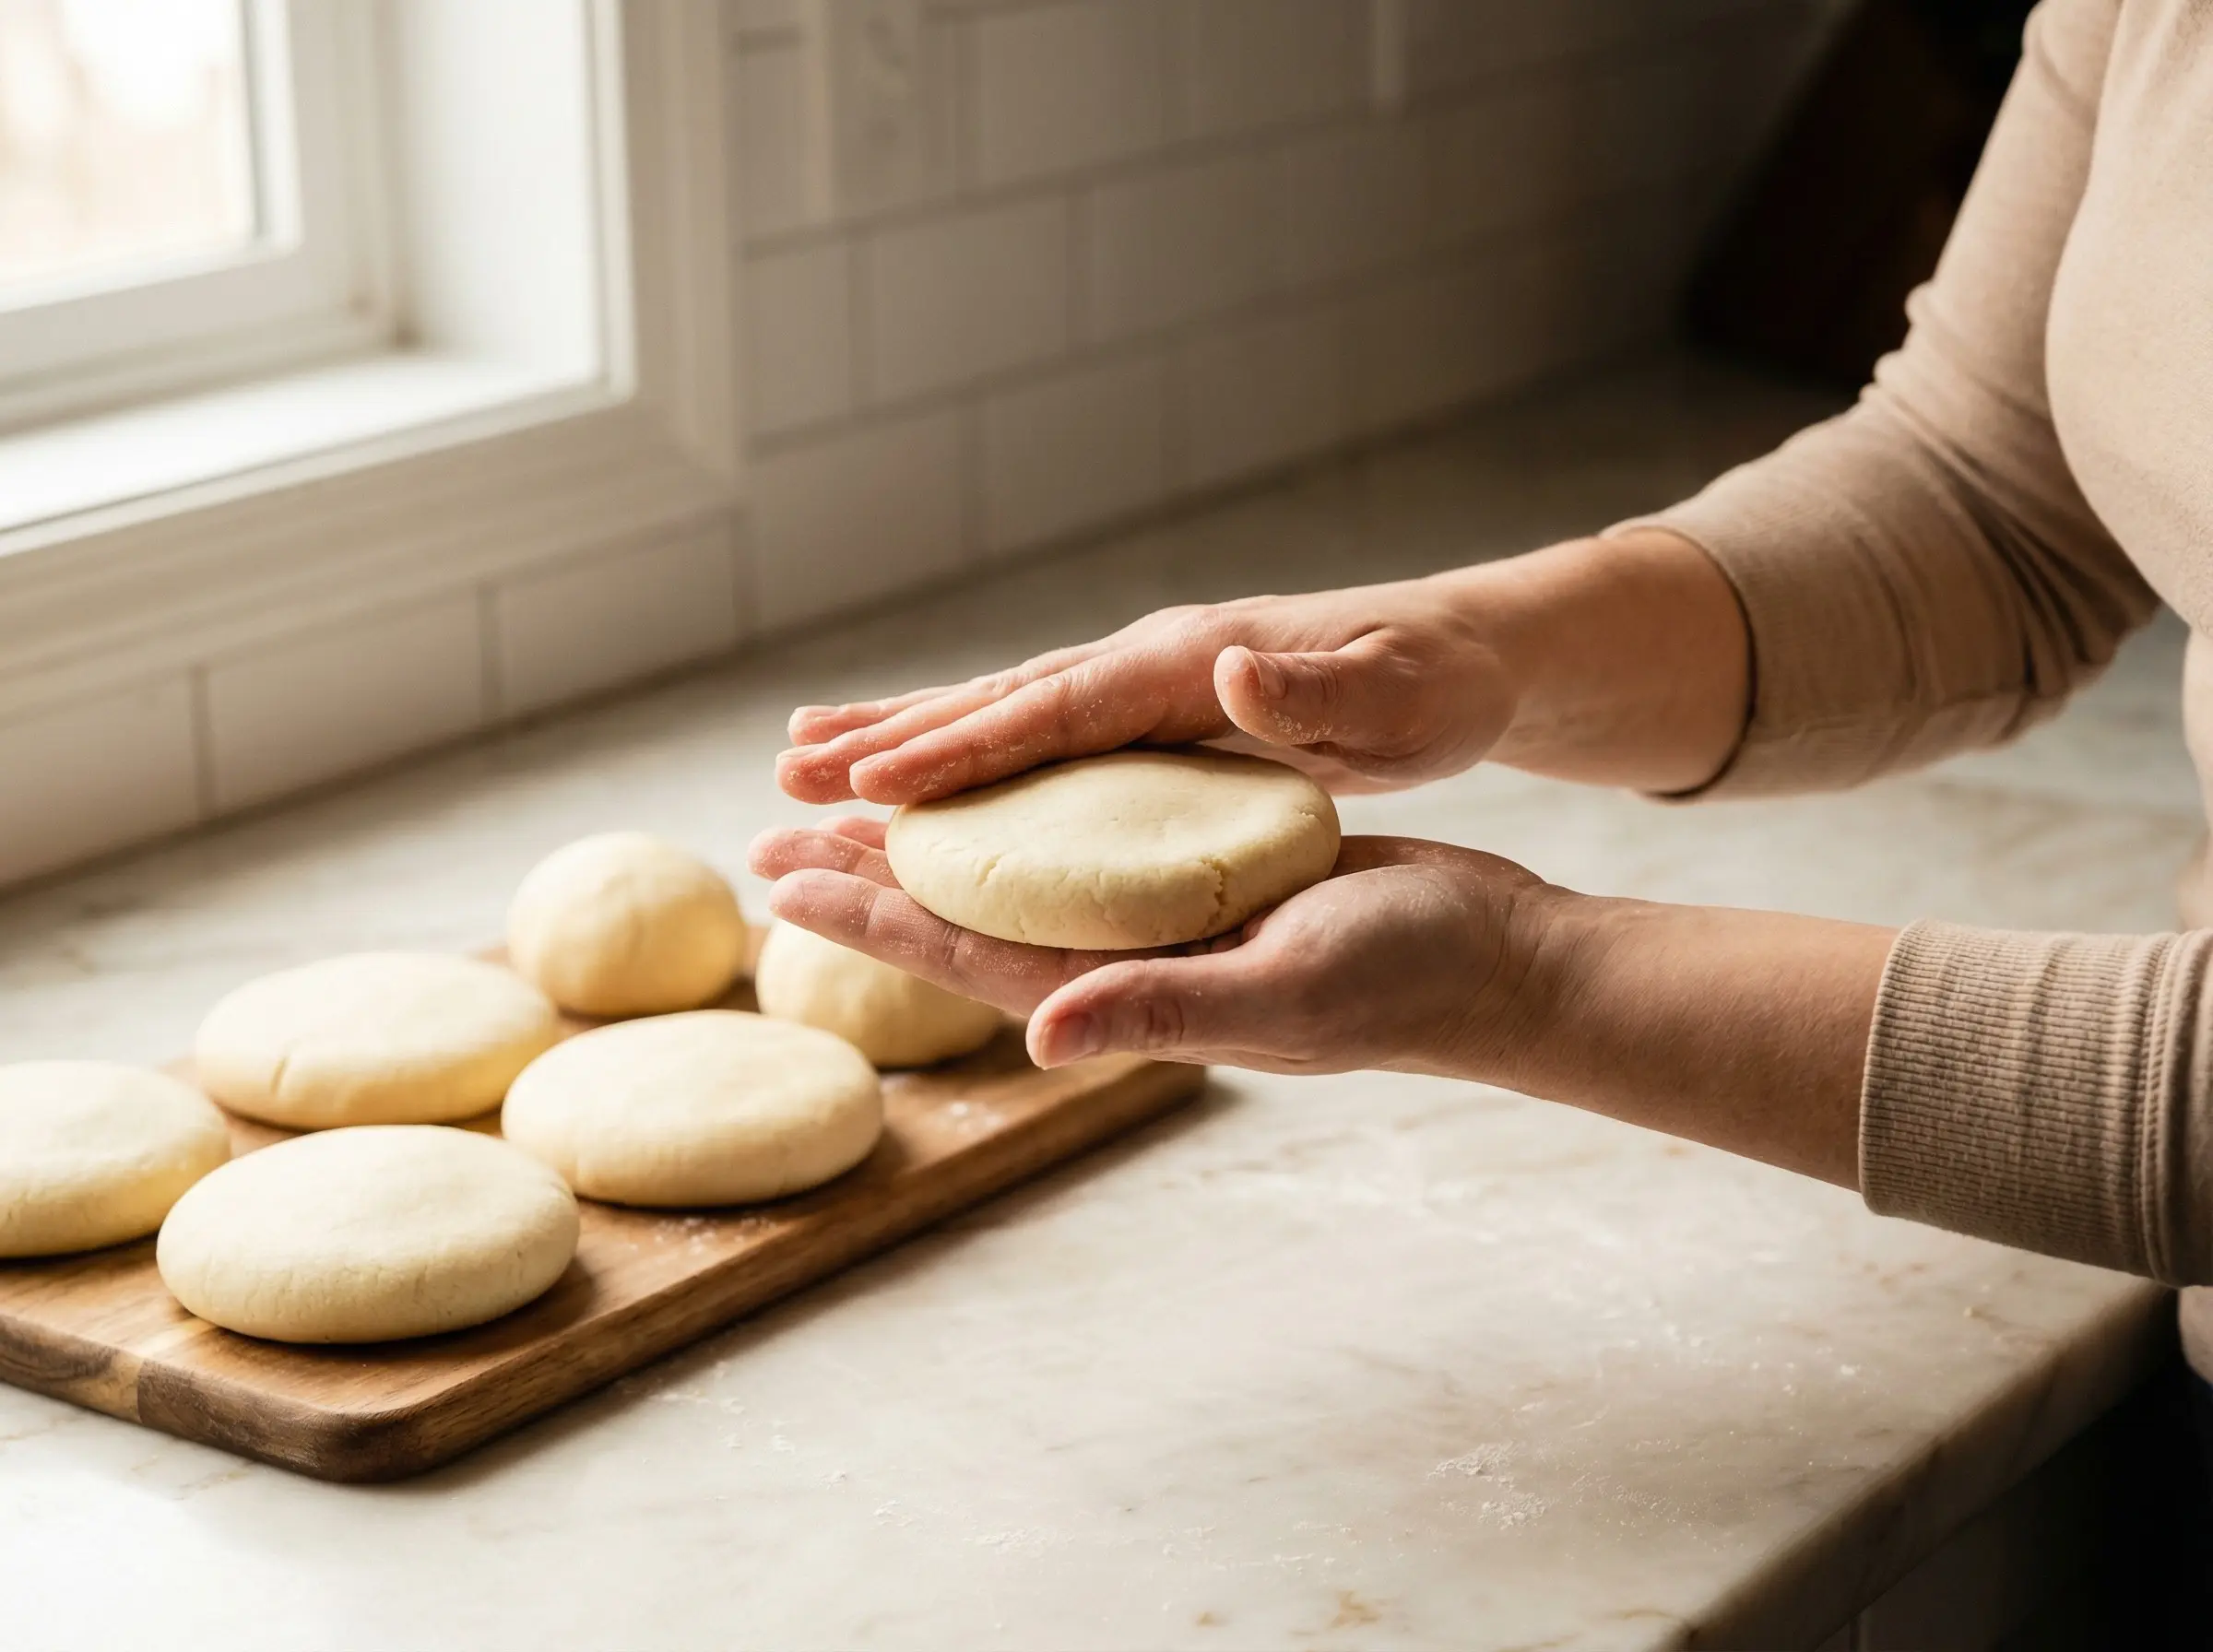
3Divide the dough into 6-8 equal portions, depending on how large you want your arepas. Roll each portion into a smooth ball between your palms. Flatten each ball into a disc about 3-4 inches in diameter and 1/2 to 3/4 inch thick for Venezuelan-style arepas (thinner for Colombian-style). Keep the edges smooth and the thickness even - cracks at the edges will cause the arepa to break apart during cooking. If cracks appear, wet your fingers slightly and smooth them out. The discs should be slightly thicker in the center than at the edges to ensure even cooking.
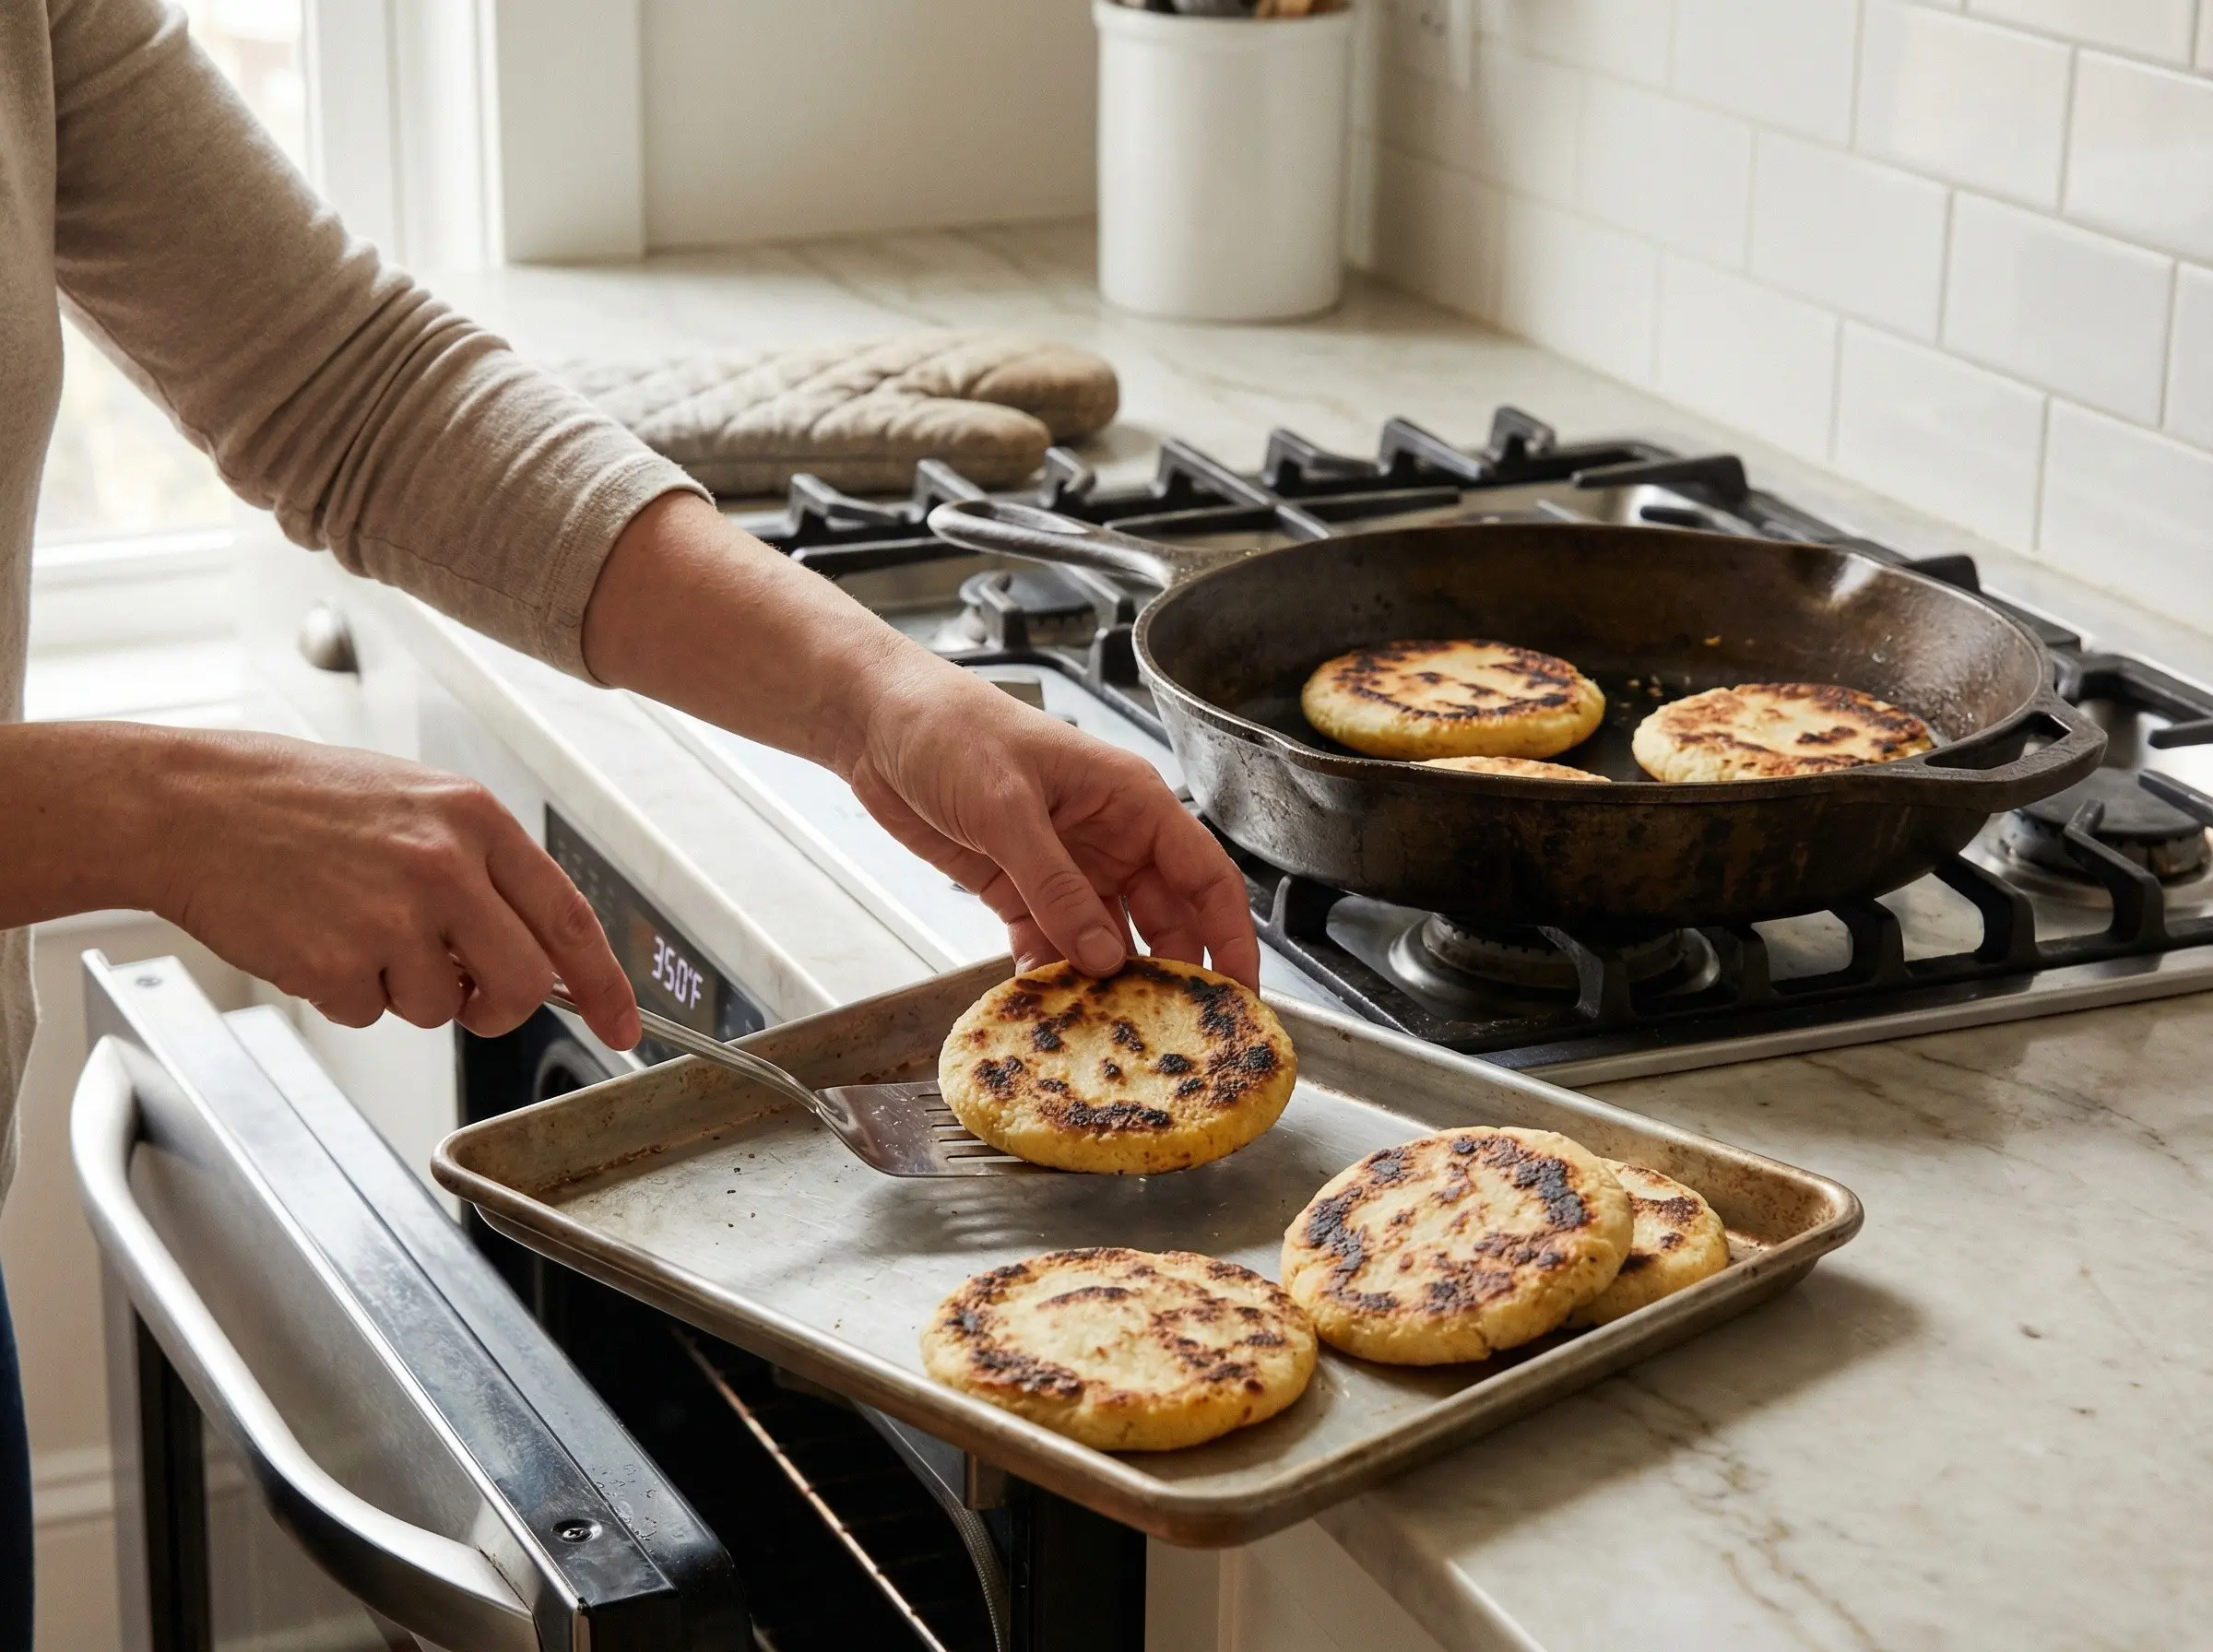
4Cook the arepas using the traditional two-step method for the best results. First, heat a dry skillet, griddle, or cast-iron pan over medium heat. Place the arepas in the pan and cook for 5-6 minutes per side until a golden-brown crust forms and the arepa releases easily from the pan. You should hear a slight hollow sound when you tap the arepa. The exterior should be dry and lightly charred in spots, with a firm crust. Do not move the arepas too soon - let them develop their crust before flipping.
5For the second step, transfer the skillet-cooked arepas to a preheated 350 degrees F oven and bake for 15-20 minutes until they puff slightly and sound hollow when tapped - this indicates the interior is fully cooked and slightly airy. Alternatively, if you do not want to use the oven, continue cooking on the stovetop over low heat, flipping occasionally, for another 10-15 minutes until cooked through. The arepas are done when they feel light for their size and the exterior is crispy. A properly cooked arepa should have a satisfying crunch when you bite through the crust.
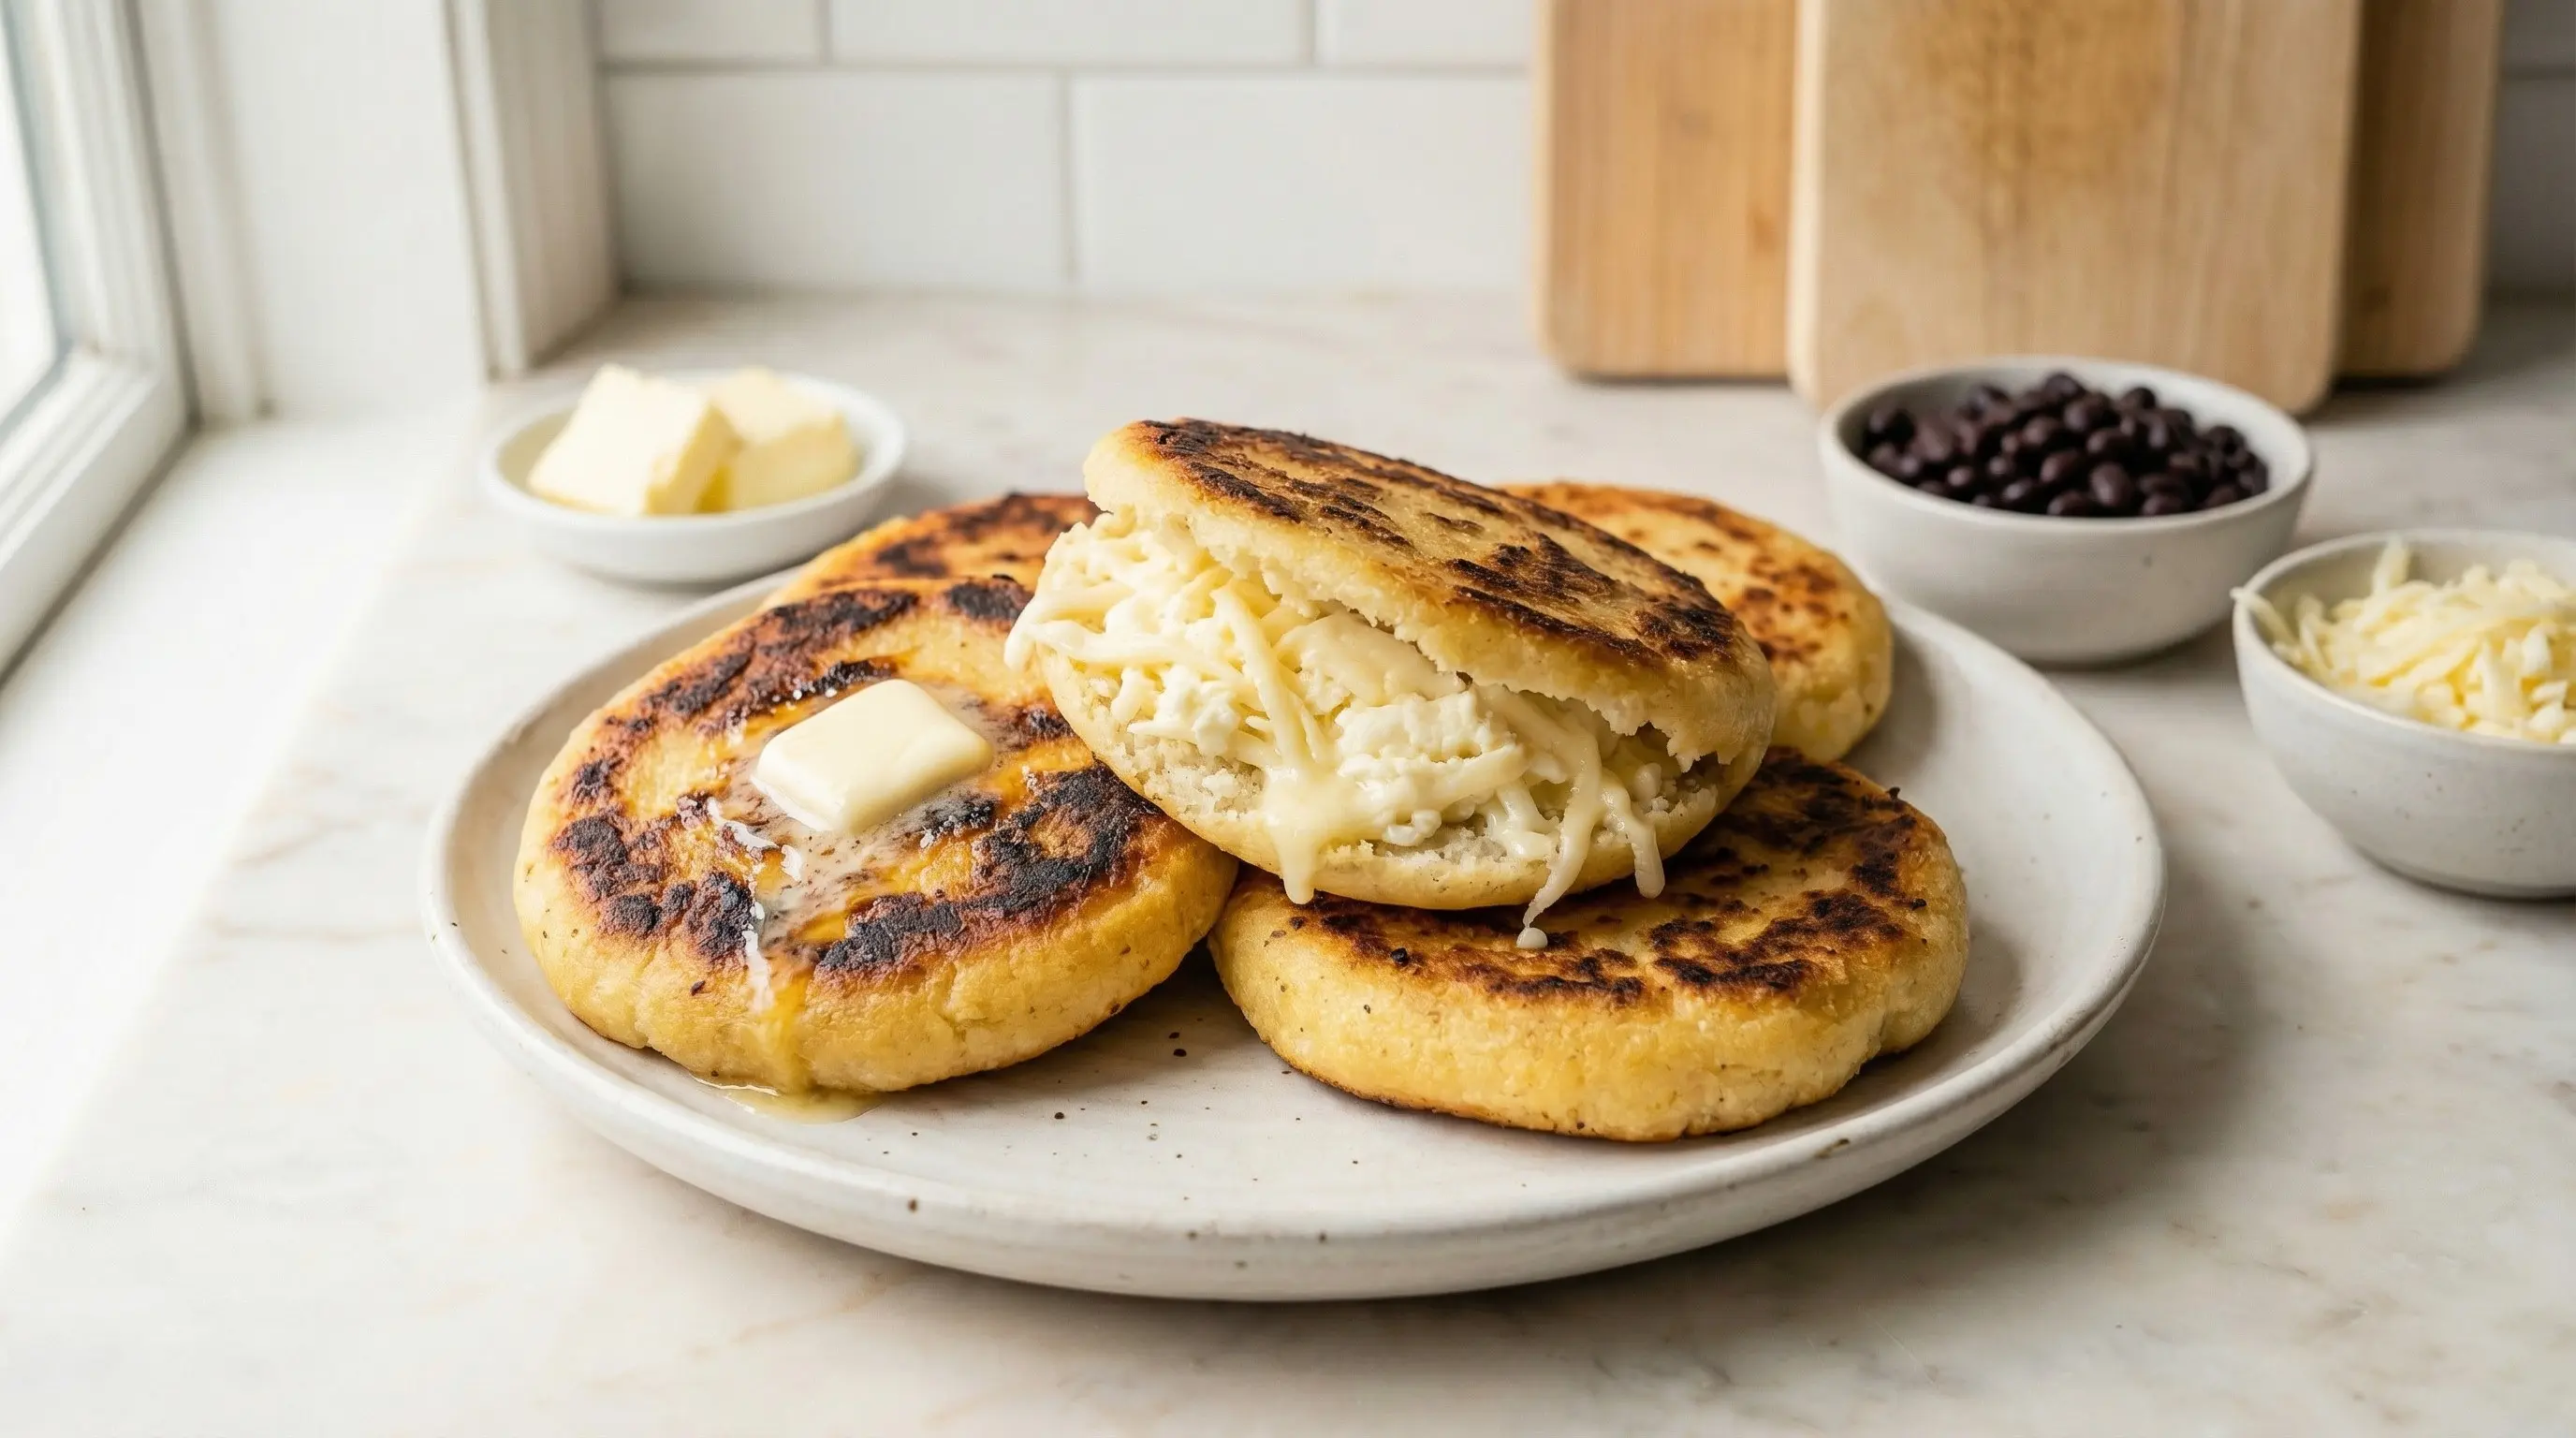
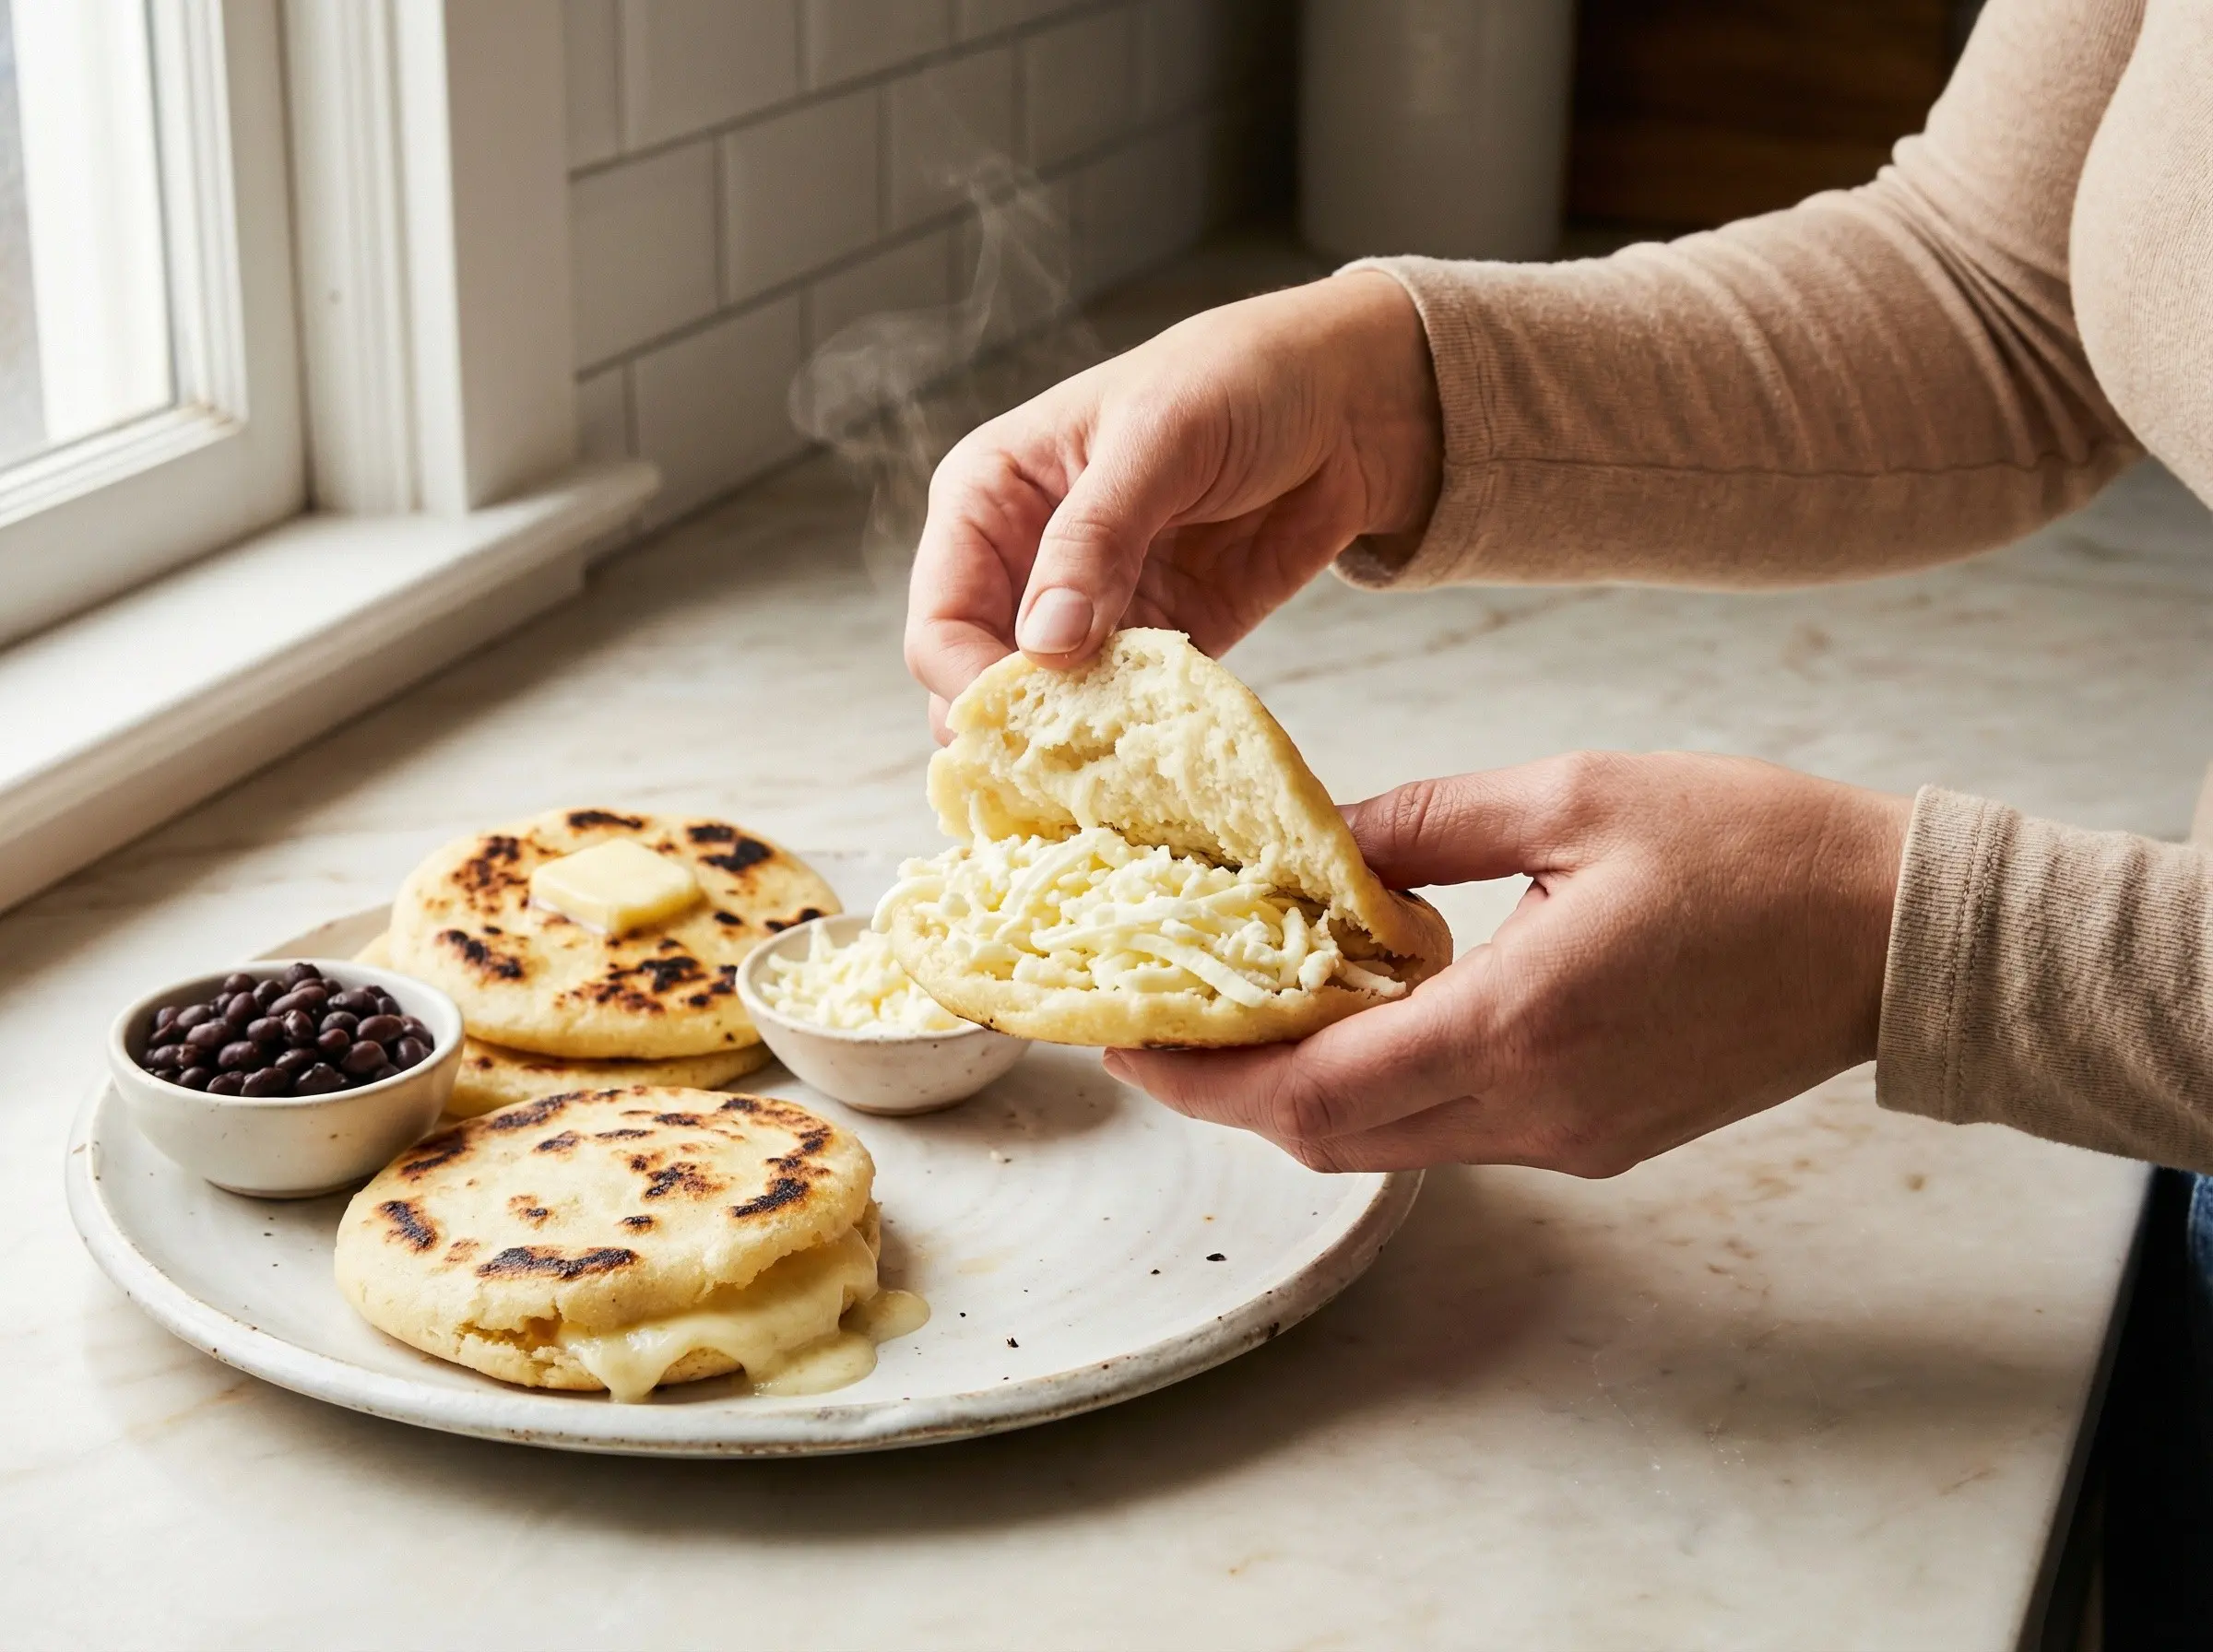
6Serve the arepas hot. For Venezuelan-style stuffed arepas, slice each one open horizontally like a pita pocket (or cut a slit in the side) while still warm and stuff with your filling of choice. Classic fillings include reina pepiada (chicken salad with avocado and mayo), carne mechada (shredded beef), pabellon (shredded beef, black beans, and plantains), domino (black beans and white cheese), or simply butter and queso fresco. For Colombian-style, serve the arepas topped with butter, cheese, hogao (tomato-onion sauce), or fried egg. Arepas can also be served as a simple side dish alongside soups, stews, or grilled meats. Leftover arepas can be refrigerated and reheated in a dry pan, toaster oven, or oven - they crisp up beautifully when rewarmed. Arepas are traditionally eaten for breakfast, but they are equally appropriate for any meal or as a satisfying snack.